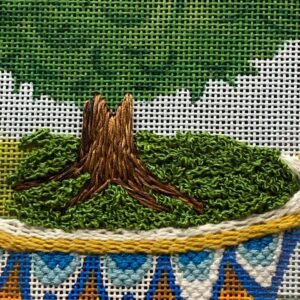
STITCH COURSE
Needlepoint Stitches - Lesson 2
these stitches can be game changers
that change the look
of your needlepoint
alternatives to the tent stitch that appears flat
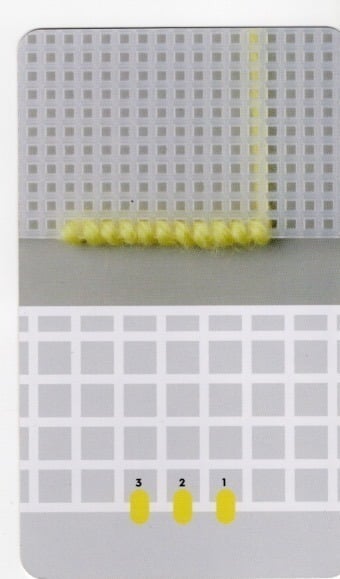
The Whip stitch above is a perfect stitch to use when you want to finish an edge,
a border and it is brilliantly easy to execute.
Stitch Whip stitch around the edge of the entire practice canvas.
Stitch close to the edge of the canvas, leaving a row on each side left empty.
The result is a square. In that square, stitch the today’s inside the square
any which way you want – as long as you get them inside the square.
If this or any other stitch is unclear how to execute,
do a Google search for the name of the stitch, then needlepoint then stitch –
(like this: whip needlepoint stitch – and go to videos and watch it being done.)
The following are in no particular order but they share
the same basic structures and possible uses.
You may be familiar with the first stitch.
It is the Brick stitch. If you have never stitched it, you have likely seen it
in canvases other people have stitched.
Brick IS VERY USEFUL.
Today we are adding in two Brick stitches. Brick is an excellent stitch for covering backgrounds; alternate rows; great for brick walls or walkways of course, and lots of other kinds of details, as the pattern can adapt in size.
The second one is the Horizontal Brick – that is worked in columns rather than rows.
To create the same look or effect but filling in a more traditional way
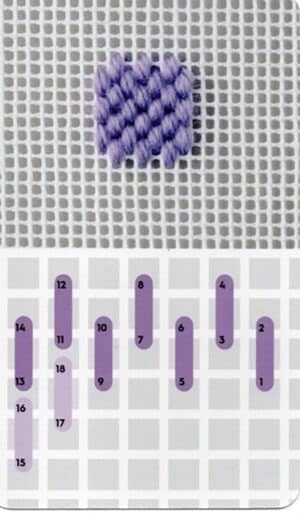
TOP: Brick
BOTTOM: Horizontal Brick
Like a knitting stitch, which we will get to further on, either of these two stitches are wonderful for stitching sweaters, scarves, and other knitted items – so they are not just filling stitches for larger areas or full backgrounds.
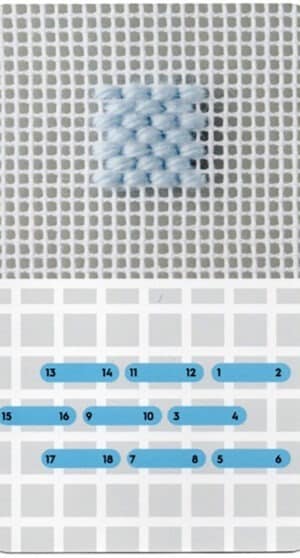
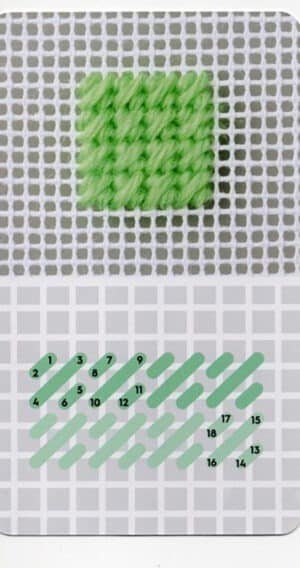
Mosaic (below) is another beautiful, easy to execute stitch that could be a go to many times over.
It is effectively a tent stitch that is sandwiched with a longer diagonal stitch as its filling….
has a bit of a padded look – adding dimension or a bit of height appeal.
Also wonderful as a single row that can make outlines or borders.
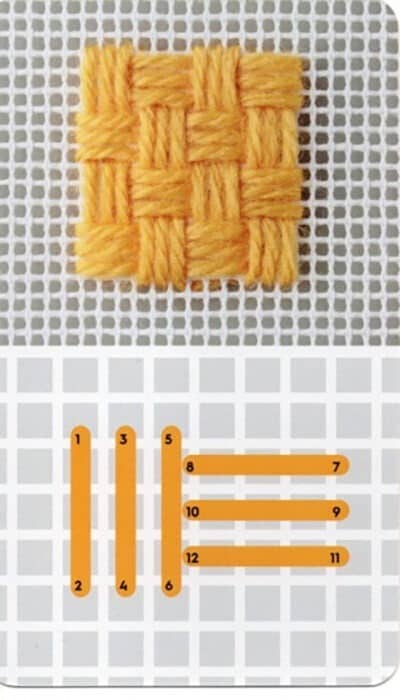
Wicker stitch (below) is definitely not flat.
Of course its name gives away at least one use for it.
This is a simple and yet a very effective stitch that makes the perfect basket texture , is multi dimensional, can cover details that are tucked into a design but not toooo small – or when you want to make a statement for a larger focal point. We love this stitch. It looks chunky to some, but it can be an interesting fill in but keep in mind, it always makes a square.
Up Next is Hungarian
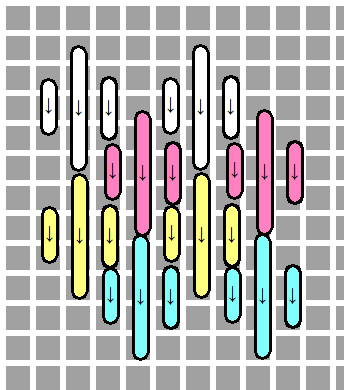
Above is the diagram for the Hungarian stitch that is on the vertical and is call the Upright Hungarian.
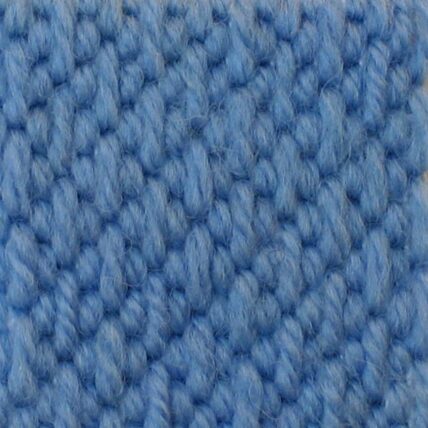
Below is what it looks like when stitched. This stitched picture was done with wool. Compare yours to the wool picture when you are done.
You will see the same stitch, but it will have a different look on a canvas when stitched with different threads.
While this is often true we will discuss how threads do the work with stitches later on.
It can also be worked on the horizontal.
If you do not have sufficient space to stitch all of today’s stitching on one blank canvas with the Whip border –
you can use the left over space from the canvas sent for Lesson One.
Hang onto all the threads as we go along , as we will be
using the ORT from lessons in further lessons. You’ll see!!
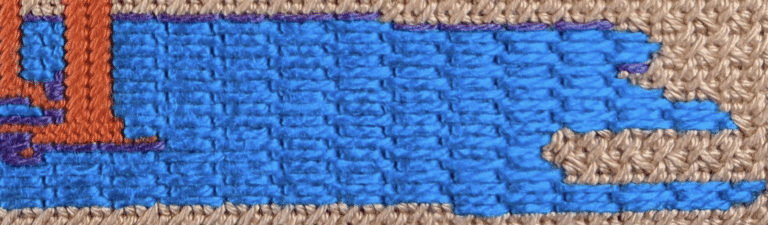
Last Month Parisian was one of the two must have stitches.
Above is an elongated Parisian (the blue) that can be useful for larger areas – same stitch just executed over more holes.
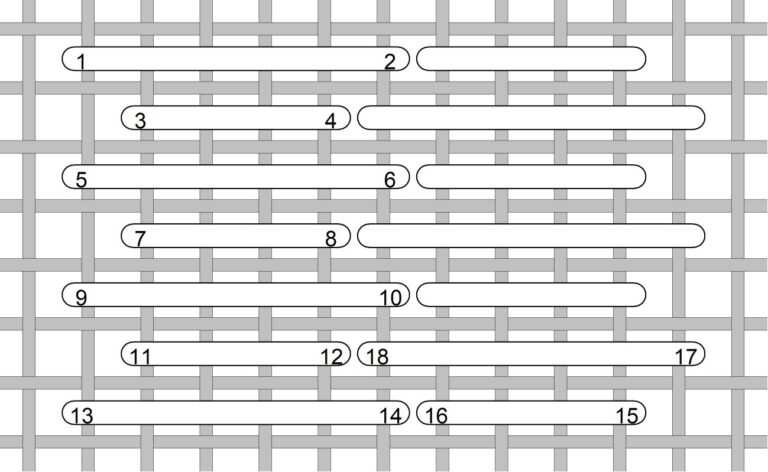
Below, a litle peek into what will be in next month: