
STITCH COURSE
Lesson IV
UPRIGHT GOBELIN OR STRAIGHT GOBELIN IS A VERTICAL STITCH
Using the wool
Using the wool, let’s begin with the Upright or Straight Gobelin. This is a very easy stitch – if you can stitch a straight line you can do this!
Upright Gobelin can be stitched with and without a padding stitch going horizontally whereupon you stitch the upright stitches.
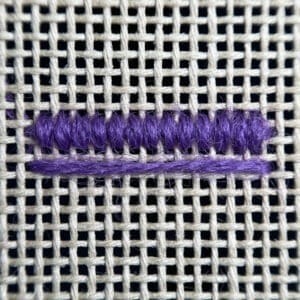
The red diagram picture immediately below shows without the straight padding stitch, and the purple diagram image below shows it with the stitching over the padding at the top and the next row is the padding without any stitches over it. The padding stitch is made as one continuous stitch for your desired width. The stitch is always over at least two holes but you can increase the depth of the stitch. It’s versatile, much like the random short and long we discussed in a previous lesson, but has a rather different presence on the canvas with clear demarcations in the rows on the diagonal such as in the left tree.
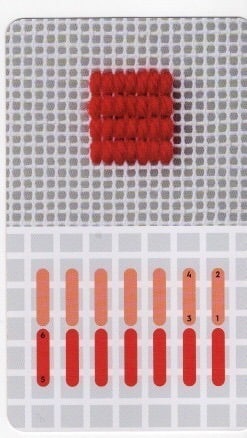
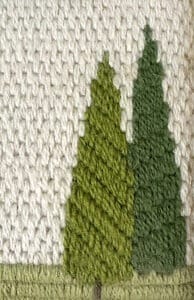
If you stagger you can drop it over two or four holes for example, and create shapes – or fill in shapes such as the trees above. It is also a great background stitch or a perfect stitch for buildings or structures with straight lines. More on this fun stitch later in the series.
Next is Encroaching Upright Gobelin Stitch which is similar to Upright Gobelin but this time with a neat tuck that makes a huge difference in small or not so small areas on a canvas. The first row is worked exactly the same as the Upright. Work from right to left, bring the needle up at 1 and down through the canvas hole at 2, up at 3 and down at four. Continue until you have a row filling your desired width, Now for each subsequent row, the stitches are tucked in alongside those made on the previous row. Working left to right, needle up at 5 and down at 6, tucking your needle to the left and behind the stitch above it.
Might be tricky at first – keep trying …. when you get it, bring out the cotton and try it with the cotton from Lesson III. Stitch next to the wool so you can see the difference with the two different threads.
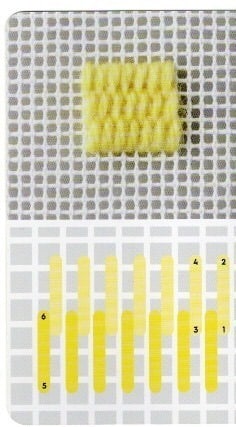
Again, you can do Upright with and without padding. The padding is the continuous stitch over however many holes until you have your desired width.
Execute both Gobelins with the wool.
Then grab some of the cotton left over from Lesson III and do these alongside the wool and see the difference.
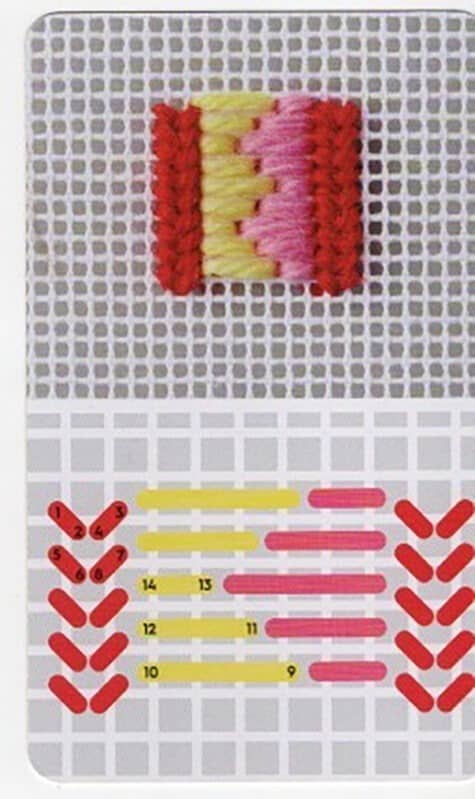
BELOW IS THE RIBBON STITCH
This is a very adaptable stitch – though it looks hard – it’s really not. You can let it be as simple or fancy as you please and you can do this stitch with any fiber including metallic threads. Look at the shape that the fully executed stitch creates. The picture shows three colors, and you can use your wool and do the same, but the stitch looks rather different when done in one color. Try this with the wool – then grab one of the Mandarin Floss f rom Lesson II and do it alongside the wool.
Working from top to bottom bring needle up at 1 and down through the canvas hole at 2 acres one intersection, up at 3, down at 4. Continue this way until you have a knit stitch column filling your desired height now move on the first half the central pen and work from bottom to top and work hole @ 9 and down at 10, across 4 holes and up at 13 and down at 14.
You’re continuing to work this way increasing and decreasing the lengths of the stitches. For the second half of the central panel (yellow) you will work top to bottom making short stitches alongside the long stitches and vice a versa. Finish off with a second column.
It may be called Ribbon, which it can do if you have a ribbon or flowing flag, but it also makes a great wall — hedges – fencing – and a lot more, which we will talk about further on.
Plays nice with a quiet stitch nearby, such as T- stitch or Continental.
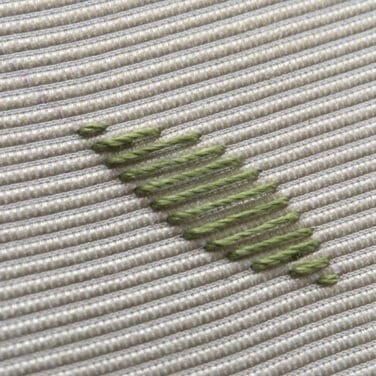
JAPANESE STITCH – ELEGANT AND EASY – BIT OF AN OPEN STITCH
This image is done as embroidery, but looks the same when on needlepoint mesh with the stitch going across the mesh – similar to the padding where you are taking the thread to your desired width.
It is a variation of stem stitch family looks like the satin stitch (previous lessons). The technique used is that of outline stitch, the only difference being that every successive stitch is made within a short gap difference Think walkways or paths in woods or steps.
Super easy – just as it looks; from right to left across the row until you have your desired width.
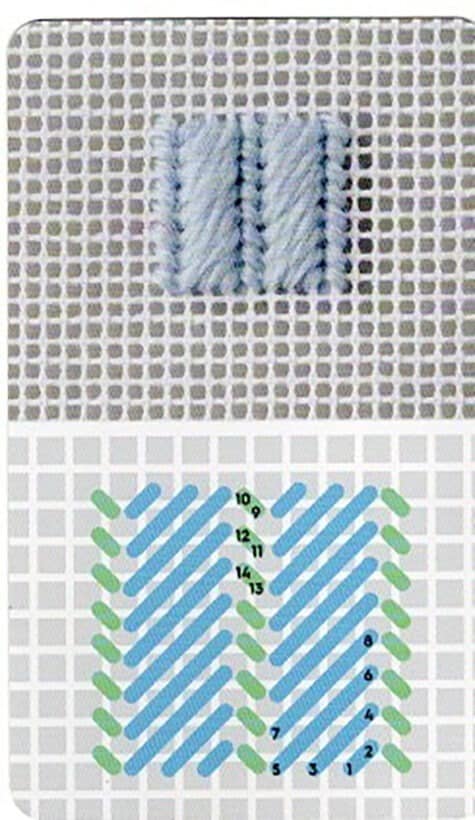
CORDUROY STITCH – another textured strip effect achieved with alternating column of diagonal satin stitch with tent. If you need a refresher see Satin in previous class. You will find many uses for this pretty witch with one color or two colors.
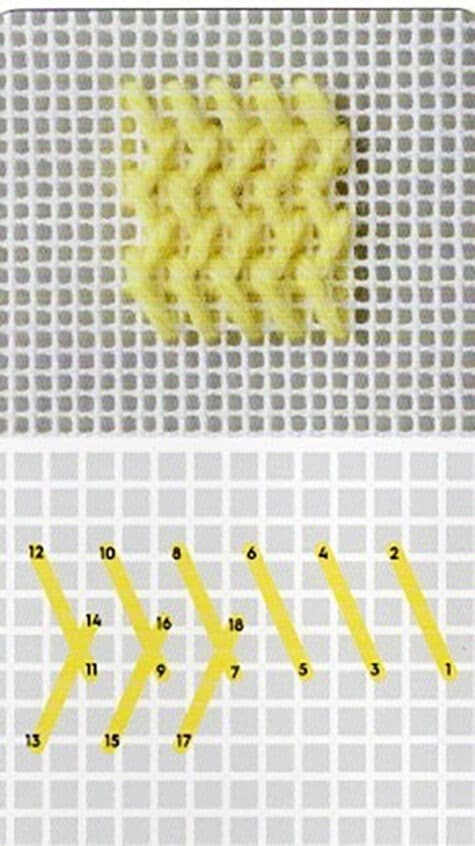
ABOVE IS THE NO STRESS TRESSED STITCH – think hair loose flowing or braids, think skies or water as you can turn it on its side . It may look fancy or hard but it is a really very easy to get the hang of quickly. Working from right to left; up at 1 and down through the canvas at 2 , across 4 canvas intersections upwards and 2 sideways. Bring the needle up at 3 and down at 4 – continue in this way until you have a row filing the desired width. By leaving a gap between each stitch, the lovely texture is shown off at its best – slightly open with lots of movement.

Next month we will discuss curves. This month, do any and all of Lesson IV stitches with one of the other threads you have been given. Lesson I had silk – compare silk with with the wool – or the cotton from Lesson III with the wool. Threads change the look.