STITCH COURSE
Lesson 3
Expanding from Tent Stitch
By now you should have your canvas and multiple cotton threads for this lesson.
Please contact us if you have not received it yet. The two gold needles sent with lesson I and II are the last needles to be sent until near the enD.
As we progress through the first six months of executing specific stitches, you will have received silk, mandarin floss, cotton, wool, and some other specialty threads.
Some future lessons will ask that you go back to earlier ones and stitch the same stitch(es) with a different fiber to see the effect that fiber haS.
Future lessons will discuss who plays nicely with who to a larger extent so that you can begin to formulate in your mind's eye - otherwise known as your creativity and intuition - what goes well with what to begin identifying how to assemble a stitch guide on a new canvas.
Needles UP!!
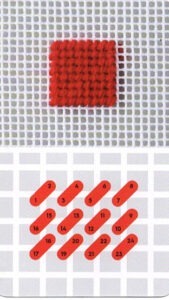
Starting from a single Tent Stitch today, above. Let’s start by changing the slant of the stitch. It will still go over one canvas intersection, but this time it will slant the opposite way from lower right to upper left. That’s a stitch too, called Reverse Tent, below.
.
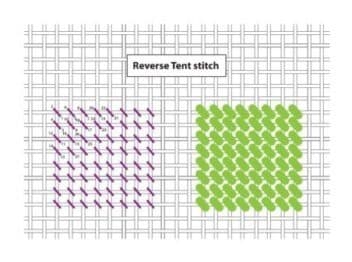
These two stitches are wonderful for stitching sweaters, scarves, and other knitted items, as well as a lot of other uses on nearly any canvas.
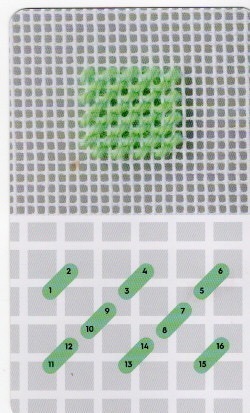
Above is a third way to stitch a Tent stitch. It is called a Skip Tent Stitch. It looks like its name where every other stitch is skipped and it creates a diagonal striped effect, leaving some of the canvas exposed. This is a simple way to do a quiet open stitch for a background, as well as varying spaces of details in a canvas.
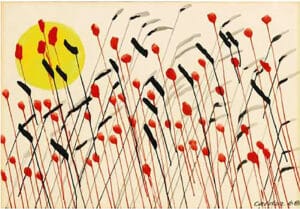
Next up is Stem Stitch. Above are lines going every which way. Try the Stem stitch when you have lines that seem to be straight but are on diagonals, up and down, left and right but are not straight.
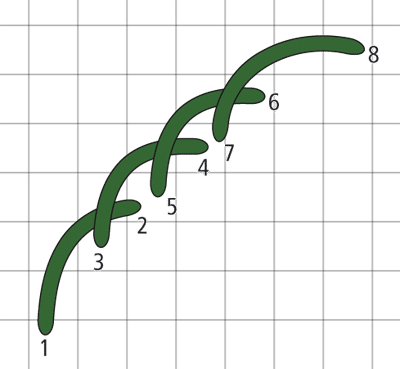
The next stitch extends the idea of using a basic, easy to execute stitch for movements in canvas details that neither tent – continental, or basketweave do well. Below is Stem Stitch. If you have never met Stem, say hello and don’t turn back. It is a very useful stitch for stems of course (both thin and thicker) as you can fit it in lots of widths and fill in an entire stem (or other area) with it.
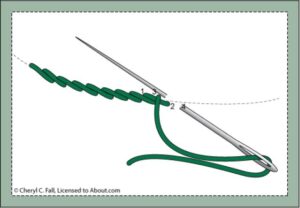
It is not hard to do … create smooth lines – make your stitches shorter when you want a tighter curve, and longer when you want a longer curve. This stitch can outline shapes – where you can choose to continue to fill in with same or a different stitch. Also for vines, wispy clouds, decorative borders, script or lettering, and more!
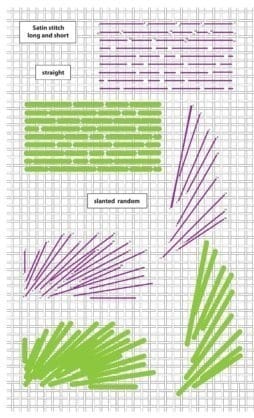
Go back to Lesson II and look at the tree trunk at the end of the lesson.
That was filled in with Random Short and Long Satin Stitch going up and down.
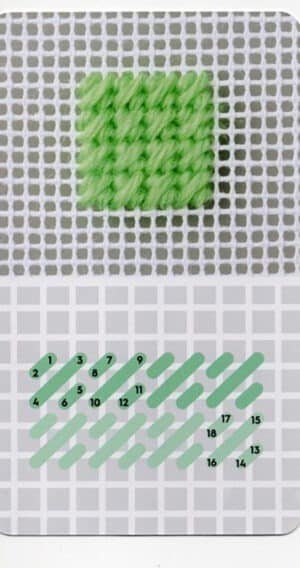
Vertical is another alternate direction to the ones in the above diagram. This stitch has many uses in most canvases. From small backgrounds and various details- slanted rain would be one of many; helpful for geometric details – and many many more uses that we will reference further into the course. Get creative!
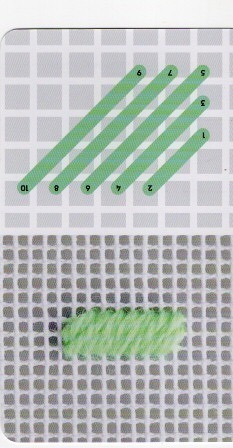
Above is the Diagonal Satin Stitch which is very pleasing as a nice and neat stitch. We will revisit this stitch also in a future lesson.
For now, stitch it with any one of the colors you were sent for Lesson III.
Next are The T Stitch and Mosaic. Two Must HAVES !
The T stitch is very easy to do over two for a quiet background when the foreground is busy – and various other uses.
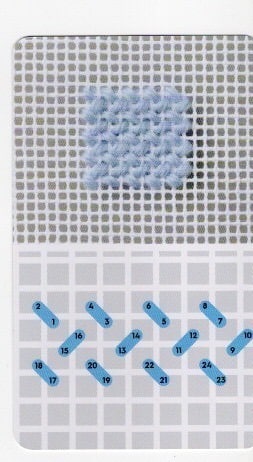
The last picture is the Mosaic Stitch. It is great for any area that is two by two making a compact visual. It is an easy-to-learn needlepoint stitch that creates a textured, slightly raised pattern with a slanted, tiled appearance. It is very similar to basketweave, as it is worked in diagonal rows. It is composed of alternating stitches over one canvas intersection and two canvas intersections.